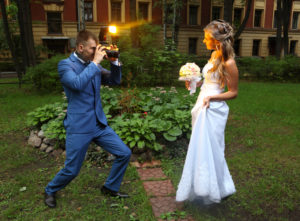
As a photographer, it’s easy and common to look back at work from the early days and see the commonplace mistakes I’ve improved on with experience. Whether you’re shooting for the professional scene or pictures of the kids for grandma, a few key operatives tips can brush up anyone’s shot. I’ve compiled 5 of the most common beginner photography mistakes I faced and how to avoid them early on, giving you a competitive edge and a fast track to higher quality photos. With these easy fixes, you can get higher-quality shots before you can even say “Cheese!”.
Posing

Since most early photos won’t be seasoned models or objects, it is valuable for a photographer to have knowledge about posing. Find feasible poses beforehand that feel natural to your subject, and then laugh with them to get the candid loose version of the pose. This tactic will help ease any awkwardness or unnatural angles that could distract from the finished product. Having easy conversation and repertoire with your model will result in a better experience and some photo opportunities that could easily be missed otherwise. It’s a good idea to have a handful of poses for your most common shoots to give as starting points for each encounter.
Framing
Creating the perfect scape for your photo can be crucial to the outcome. Framing is important on many levels. You want a background that has balance without the symmetry being divisive or distracting from the subject. It should also be complementary to the photo and have appeal and texture without being overwhelming.
Staging

Alongside framing the picture, staging the shot can make or break the entire scene. Staging should be simple and lined up with balance and without being distracting. The shot should be lined up to compliment the subject without taking the focus away. You don’t want to cut off any body parts of the subject or have strange divisive edges such as horizons cutting the photo into two. According to format.com, another common mistake here is objects “growing” out of the subjects head, so it’s vital to look for these potential blunders while staging the shot.
Lighting

Lighting is a huge and complex element of photography that is very obvious when executed poorly. Luckily there are some quick fixes to make any scene or object look like a million bucks. For outdoor lighting, be sure to scout the location and plan for the best lighting of the day, usually being closer to sunset or sunrise. Harsh, direct, mid-day lighting can cause squinting, shadows, irregular highlights and more. Subdued, well-lit areas are the best go-to. For indoor lighting, you want broad indirect light. The light source should also be closer to the subject of the photo for best focus and shadow dimension.
Angles

The angles of the shot can add variety and creativity and are fairly easy to accomplish simply by getting active during the shoot. It’s important to remember that the subject is probably seen every single day at eye level, so getting a new angle can really add the artistic touch. This is why shots of buildings from the ground perspective, or a model’s face from above or below can be so interesting to us. It’s a new, uncommon, less conceivable view of something that could be otherwise mundane.
So, just go ahead and take the shoot, start walking, jump into the water and, just do it!
After that you can visit https://photographertouch.com for more in-depth guides, and actionable tips


